Monday, September 28, 2009

Renaissance Festival

It was my mother's birthday last saturday and she wanted nothing more than to go to the Maryland Renaissance Festival in Crownsville. Now it rained for most of saturday afternoon, but this actually made for some awesome HDR clouds. Between showers we managed to catch some jousting... here are the results:


Friday, September 25, 2009

Bottom Road

My mother lives just north of Loch Raven Reservoir where there are some incredible country roads with trails, bridges and breathtaking scenery. I took my camera up there this week to see what HDR could do with nature:

Tuesday, September 22, 2009

Weber's Farm

Last weekend Weber's Cider Mill Farm held their annual Johnny Appleseed Festival. The farm is a little over a mile from our house so we stopped in for an apple cider slush.

While we were there I decided to try a few more HDR images. The one above is created with a single image processed at three different exposures. I have found that when using only one image there is far more noise in the image. I suppose this makes sense - the same way trying to bring up the exposure on an underexposed image would create noise.


This second image was processed using three separate images. The people in the image were moving so there is a slight ghosting effect on their legs. The HDR processing works on the rest of the image though... It was interesting to see the way tone mapping handled the sky. There was a distinct halo around the trees (you can still see a hint of it). It took quite a bit of playing around to soften it without losing the HDR look.

I think my most successful HDR Image of the day was the above image of the produce crates, although it is a far more dramatic HDR tone mapping than I have been doing...

Sunday, September 20, 2009

The Neighborhood @ Night


The shutter release I ordered last week arrived and I have been experimenting with long exposures and night photography. This was entirely new to me. I set up the tripod on my front porch and started shooting. Now, what you see in the images is not what the neighborhood looked like to the naked eye. It was almost midnight and extremely dark... these images have so much more detail than what the eye could see.

Across the Street
ISO 200 F/3.5 73 Seconds WB3650k

Our House
ISO 200 F/5.6 9 Minutes WB3150k

In the full version of the image of our house you can start to see the rotation of the earth as the stars start to streak. I This has inspired me to try an even longer exposure... maybe a few hours... where you can really see the rotation. I doubt that I will be able to do this in my neighborhood though because of the light pollution...

Jeremy Standing on the Sidewalk.
ISO 200 F/3.5 29 Seconds WB3550k
In order to get this image I shined a flashlight on him for about 5 seconds.


I know that this technique has been done, but I really wanted to try light-writing. We used the gas lighter we have for our citronella candle to burn writing in the sky.


This would have been easier with a constant light - it was challenging to keep the flame lit as we moved it through the air.


Once you got used to writing backwards this light writing was really fun... I'd like to do a project using a technique like this one day. Any ideas?


______________________________________________________________________

The following night we had a power outage in the neighborhood. I was curious about how the neighborhood would look without all of the light pollution. I had a hard time getting any detail with the exposure times from the night before so I tried an even longer exposure. The results were crazy. Although the neighborhood was pitch black, the images looked as though they were taken at dusk/dawn.


Midnight Sky.
ISO 100 F/5.6 181 Seconds WB2650k


During the exposure of the second image the poswer came back on for the last ten seconds of the exposure. It ended up working out well - you were able to see the window lights and front porch lights without them being blown out (like the night before).


The Neighborhood at Midnight.
ISO 100 F/5.6 454 Seconds WB2950k

Tuesday, September 15, 2009

Sunflowers

I was driving this past weekend out near the MD line exit of I-83 when I saw this ridiculously awesome sunflower field on the side of the road. I came back the next day with my camera (and some friends). It was unbelievable! I've never seen so many sunflowers in one place in my life...


While we were taking pictures a local farmer pulled up in a golf cart and started telling us about how the field is owned by a company that makes sunflower oil. Apparently most of the company's fields are down near Gettysburg but they recently bought some land in MD/PA. This is the second year the sunflowers have bloomed here.

Lighting:

The light was pretty harsh at the time of day we were visiting and as it happened most of the sunflower heads were facing away from the sun... meaning I would need to shoot into the sun to photograph them. I came up with an idea to try and overpower the sun with my Speedlight off camera. I set my onboard flash and Speedlight to synchronizing channels and activated the Speedlight as a slave in TTL mode, then held the Speedlight right up to the Sunflower. So here's the first image I took:

As you can see I was still getting a fair amount of flair (but I thought the image itself exposed nicely). After some fine tuning I was able to avoid the blotchy glare and get a nice sunburst from the sun. In order to get the sky exactly how I wanted it though I was having to underexpose the foreground (even with the fill flash). Even though my HDR book had not yet arrived I had read enough online tutorials to set up my camera for auto bracketing... and with that I attempted my very first HDR image:


Obviously the results are far better than the first image I took. I was able to get far more tones and the result is a softer, more evenly balanced image. This HDR process was not problem-free, however. I did run into a few of the quirks of HDR. The sunflowers, for example, were moving in the wind. Although I had shot using auto bracketing I had not changed my settings to continuous shooting mode. There was a small lag between shots. You can see with the flowers on the left that when Photomatix merged the images together it ghosted the outline of where the flowers had been in the other images. The effect is kind of neat in it's own way but not ideal for what I was trying to achieve. The flower in the foreground had the least amount of ghosting issues. I'm not sure if that had to do with it having less movement or being on the same plane as the lens... or whether it's to do with it getting more light being closer to the flash. Either way, I'm relatively pleased with it as my first attempt at HDR.

Light Painting:

Since there were such awesome colors and textures, I figured I'd play around with some slow shutter speeds and take a stab at light painting. I wasn't sure whether it would work since it was still daylight but I found that as long as I was shooting towards the ground the images weren't getting blown out. I took a few where parts of the image were still recognizable:


And then some that are a little more abstract:


HDR Portrait:

Our friend and her little girl came on the 45 minute drive up I-83 with me to take these pictures. I took a few photos of them but when I got back I realized that the shadows on some of the pics were pretty harsh... After processing that first HDR I wondered how Photomatix would do with a portrait. I didn't have multiple files for these portraits but I had read about generating HDR images from one RAW file so I gave it a try. I processed the original raw at three different exposures, saved them as TIFF files and imported them into Photomatix. After a little over an hour of fiddling with the slider bars in the tone-mapping stage I got the image looking semi-decent then brought it into photoshop for finishing touches. You can clearly see the difference between the original and the final image:


Sunday, September 13, 2009

Shutter Remote


I've been doing a fair amount of research on night photography and longer exposures recently. It's an area I've never really experimented with. I found some really neat photos where you can see the rotation of the earth with star streaks and the photographers on flickr are awesome enough to disclose all of the information about multi-hour exposure times etc... I thought I'd give it a try so I drove out to my mother's house in Baldwin, MD one night because there's less light pollution out there. I set up the tripod and got the camera all set up only to discover that the longest my shutter can remain open is 30 seconds standalone. I sat down with my manual for about an hour and it specifies that for exposures longer than 30 seconds the camera must be set in 'bulb' mode. I went out and set everything up again but apparently "bulb" mode requires that you physically hold the shutter release. I wasn't about to do that for an extended period of time so I called it a night. I did some more research and realized that for exposures longer than 30 seconds a remote (with lock) is needed. Blah.... more money. I ordered the remote from amazon: $70.00. Hopefully it will be here by the end of the week so I can play.

Tuesday, September 8, 2009

Photomatix and HDR Book

This first week I've mostly done research, part of which included finding a good book from which to learn more about High Dynamic Range Imagery. After reading dozens of book reviews I went ahead and ordered Lark Photography's Complete Guide to High Dynamic Range.

Based on what I've read, this book seems to offer the most information on each set of controls in the HDR process. I am more interested in the type of HDR images that still retain the photographic look (like the ones on the cover of this book). I really wanted to find a book that would give me the most control over my images so that I can avoid the over-sharpened cartoony look that many online tutorials result in.

Speaking of online tutorials, my go-to salesman at Penn Photo in Pikesville recommended a site to me this past weekend with a reputable HDR tutorial ( Stuck in Customs). I plan to walk though that tutorial next week if this book doesn't arrive (who knows with Amazon's Super Saver Shipping).

And of course, in order to really learn HDR you need to have Photomatix so I went ahead and bought the Photoshop plug-in...

Thursday, September 3, 2009

Syllabus & Course Outline

Leah Rhianne Matthews

M.F.A. Integrated Design

Fall 2009: Professor Julie Simon


Course Objective:

The objective of this course is to explore advanced techniques in digital photography and photoshop manipulation in order to refine the photographic portion of my portfolio. As a photographer I have found that once comfortable with a technique I tend to stick with it. It has been difficult for me to then branch off and try new things. Since I last took a digital class there have been many techniques I’ve seen utilized that I would like to explore. With this independent study my primary goal is to challenge myself.


There are five core areas I plan to explore:

1. Photographic Techniques:

Specifically:

- Night Photography

- Long-Exposure Photography

2. Processing Methods:

Specifically:

- Digital Coloring

- HDR Imaging

- Digital Infrared Photography
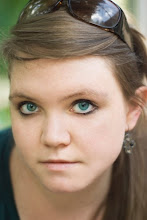
3. Retouching:

- Explore a variety of methods different from those I currently use

(example: skin smoothing, anti-aging, eyes, make-up etc...)

4. Manipulation:

Specifically:

- Seamless Compositing (professional-quality)

- Stylized Manipulation using filters and blending modes (ex: high-pass filter)

- Photography-based Digital Painting

5. Promotion:

- Brand myself as a Photography Professional by designing business cards, letterheads etc...

- Update and re-structure my web portfolios


Assignments/Presentation:

Each week I will upload my finished works, works-in-progress and a blurb about what I have learned and what I’m working on to a blog-style link. I will send this link to the sponsoring professor for revision/analysis. Each assignment will include full documentation of any tutorials, references or inspirations used.


Proposed Grading Rubric and Explanation:

1. Completion & Quality of Weekly Postings.................................................. 30%

2. Photographic Explorations (night/long-exposure).................................... 15%

3. Processing Explorations................................................................................. 15%

3. Retouching Explorations................................................................................ 15%

4. Manipulation Explorations............................................................................. 15%

5. Promotion.........................................................................................................10%


Since this class is not structured to meet on a weekly basis, I feel as though the completion and quality of the weekly postings should be most heavily weighted because they will demonstrate the level of work being put into the class. All three of the areas I plan to explore (photographic technique, processing, retouching and manipulation) are evenly weighted at 15% while promotion is weighted least heavily at 10%. The reason for this is that I do have a web-portfolio in place for this portion of the course and my efforts would be to improve upon what I already have created rather than design from scratch.